Evaluating the Space and Choosing the Right Location
When planning a diy kids desk, the first step is to assess the available space. Here are key factors to consider:
- Size of the Room: Measure the room to find out how much space you have. A small desk fits well in a tight corner, while a larger room may allow for a more spacious desk.
- Desk Placement: Look for a location near natural light sources, but avoid places where direct sunlight might be too harsh. Also, ensure the chosen spot is away from high traffic areas to reduce distractions.
- Accessibility: Make sure your child can easily reach and use the desk. It should be placed at a comfortable height and allow for easy access to their chair.
- Power Outlets: If the desk will hold a computer or lamp, choose a location near power outlets.
- Room Layout: Consider how the desk will fit with the current room layout. It shouldn’t disrupt the flow or make the room feel cramped.
- Safety: Keep the desk away from sharp corners or potential hazards. Especially consider this if you will incorporate moving parts or construction elements into the desk design.
Assessing the space thoroughly will help you in deciding on the perfect spot for your diy kids desk. By choosing the right location, you’re setting the stage for a quiet, comfortable, and inspiring place where your child can study and play.

Selecting the Right Materials for Durability and Safety
Choosing appropriate materials is vital for crafting a durable and safe diy kids desk. Consider the following:
- Type of Wood: Hardwoods like oak or maple offer durability, while softwoods like pine are lighter and more affordable. Always opt for splinter-free surfaces.
- Finish and Paint: Use non-toxic, child-safe paints and finishes to avoid any health hazards. Water-based products are generally safer and easier to clean.
- Hardware: Select screws and fastenings that are sturdy and have rounded edges to minimize injury. Avoid anything that juts out or is easily detachable.
- Stability: Make sure all materials contribute to the overall stability of the desk. It should withstand the weight of books, a computer, and enthusiastic activities.
- Ease of Cleaning: Pick materials that are easy to wipe down and maintain. Kids can be messy, so surfaces should resist stains and be easy to clean.
- Eco-friendliness: If sustainability is a concern, choose recycled or eco-friendly materials to support a healthier environment.
Balancing durability and safety when selecting materials will ensure that the diy kids desk stands the test of time and is a secure place for your child to work and play.
Design Ideas for a Functional and Creative Desk
When crafting a diy kids desk, combining functionality with creativity is essential. You want a desk that not only meets your child’s needs for study and play but also inspires their imagination. Here are some design ideas to consider:
- Adjustable Features: Create a desk with an adjustable height to grow with your child.
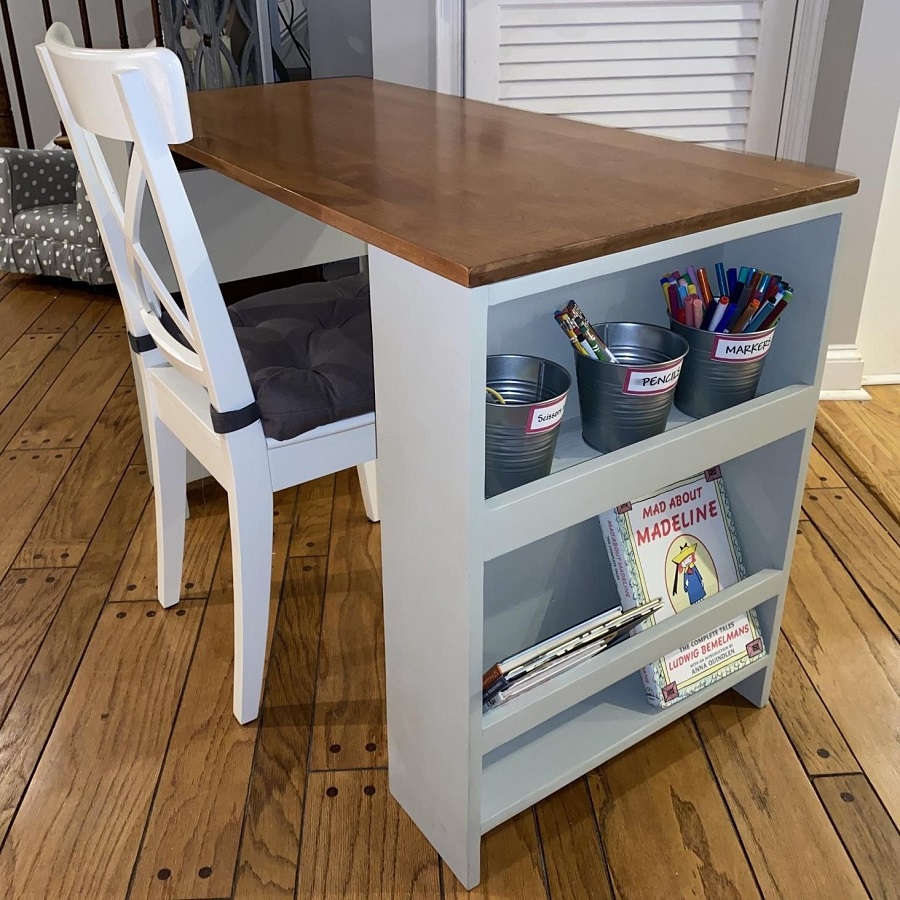
- Built-In Shelving: Add shelves under or above the desk to keep books and supplies within reach.
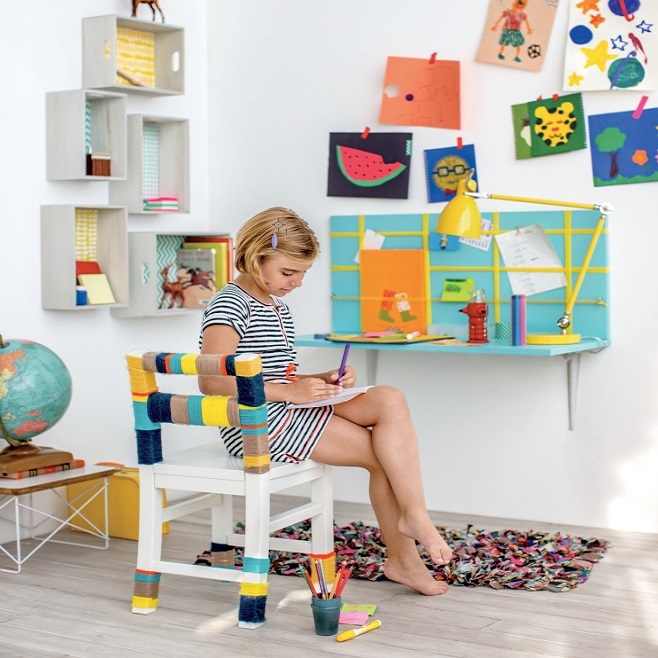
- Colorful Design: Use bright, cheerful colors to stimulate your child’s mood and creativity.
- Chalkboard Surface: Paint one section with chalkboard paint for a fun drawing space.
- Hidden Compartments: Design secret drawers for your child to discover and store their treasures.
- Multipurpose Space: Allow room on the desk for both homework and craft projects. Consider a foldable design for more space when needed.
- Cable Management: Include built-in cord organizers to keep electronic cables neat and safe.
Remember to involve your child in the design process. Their input can make the diy kids desk truly unique and better suited to their personal style. Every feature should aim to blend practicality with a touch of whimsy for a space that they’ll love using every day. Keep these ideas in mind and let creativity guide you as you move to the next step: actually building the desk.
Step-by-Step Guide to Building the Desk
Now that you have a vision for your diy kids desk, it’s time to start building. Follow this simple guide:
- Gather Your Tools: Before you begin, collect all necessary tools. You’ll need a saw, drill, screwdriver, and sandpaper at a minimum.
- Cut the Wood: Based on your design, cut the wood to the required dimensions. Take care to make precise cuts for a perfect fit.
- Assemble the Frame: Start by constructing the desk frame. Securely attach the legs to the desktop using screws. Ensure it’s stable.
- Add the Surface: Once the frame stands firm, attach the top surface. Use screws or nails to keep it in place.
- Sand Edges: Sand down sharp or rough edges. This step is crucial for your child’s safety.
- Apply Finish or Paint: Choose a child-safe finish or paint and apply it evenly. Let it dry completely.
- Install Shelving: If your design has shelves, attach them now. Make sure they’re sturdy and level.
- Add Extras: Install any additional features like cable management systems or hidden compartments.
- Final Check: Go over the desk to ensure everything is secure. Pay extra attention to screws and edges.
- Clean Up: Wipe down the desk to remove any dust or debris from the building process.
Crafting a diy kids desk can be a rewarding project. Take your time at each step to ensure you create a safe, durable, and functional piece for your child.

Tips for Customizing the Desk for Your Child’s Needs
To make a diy kids desk truly special, customize it to fit your child’s unique needs. Tailor it with thoughtful touches that will enhance your child’s comfort and productivity. Here are some tips to personalize the desk:
- Ergonomics: Adjust the desk and chair height so your child can sit comfortably. Their feet should rest flat on the floor, and elbows at a 90-degree angle when working.
- Favorite Colors: Use your child’s favorite colors for the paint or accents to make the desk more inviting.
- Personalize Space: Leave space for your child’s nameplate or to display artwork. This makes the desk feel like their own.
- Accessory Rails: Add rails or hooks for hanging bags, headphones, or other gear. It helps to keep essentials at arm’s reach.
- Lighting: Install a good-quality lamp. Ensure the light is bright enough for reading and writing, without causing glare.
- Comfort Accessories: Include a comfortable chair cushion or an ergonomic wrist rest for computer use.
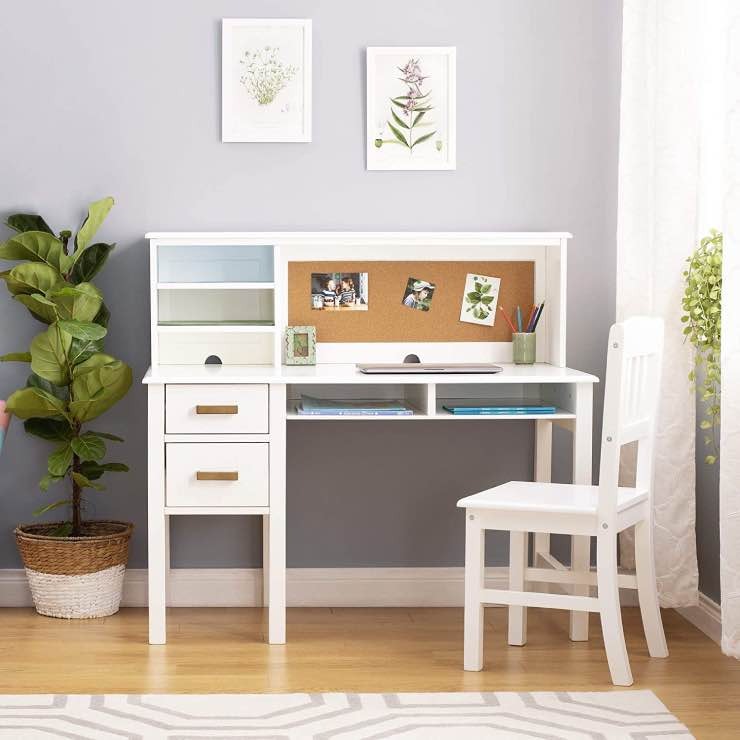
- Bulletin Board: Attach a bulletin board or magnetic board for them to pin items and showcase creativity.
These simple touches will go a long way in creating a space that supports your child’s activities and reflects their personality. With a diy kids desk tailored to your child, you’re fostering a sense of ownership and pride in their workspace. This can greatly contribute to their motivation and success in their studies and creative endeavors.
Incorporating Storage Solutions in the Desk Design
When you build a diy kids desk, smart storage is key. It helps keep the space organized and functional. Here are some ways to include storage in your desk design:
- Drawers: A classic choice. Add one or more drawers for pens, notebooks, and small tools.
- Cubbies: These open spaces can store books and boxes. They make items easy to find.
- Hooks: Install hooks on the side for backpacks or headphones. They save desktop space.
- Slide-out Trays: Great for keyboards or art supplies. They hide away when not in use.
- Overhead Hutch: Use vertical space. Shelves above the desk can hold more without crowding.
- Magnetic Strips: Perfect for metal items. Scissors and clips can hang within reach.
- Pegboard: Customize with pegs for hanging various items, like rulers and tape.
- Bins and Baskets: Colorful options for loose items. They can slide under or sit on the desk.
- Under-desk Shelving: Use the empty space under the desk. Ideal for larger books and papers.
Think about your child’s activities. Choose storage that supports their work and play. Always ensure these elements are within their reach and secure. Your child’s diy kids desk will be clean and inviting. They’ll find it easier to focus and let their creativity flow.
Ideas for Decorating and Personalizing the Kids Desk
Now that the diy kids desk is built, it’s time to add some flair and personality! Here are creative ways to decorate and personalize your child’s desk:
- Stickers and Decals: Let your child choose stickers or decals to make their desk one-of-a-kind.
- Themed Knobs: Replace standard drawer knobs with themed ones reflecting your child’s interests.
- DIY Drawer Liners: Use colorful paper to line the drawers for a fun surprise every time they open them.
- Handmade Artwork: Frame and display your child’s artwork on or near their desk.
- Photo Garland: Create a string of photos showcasing family and friends, and drape it around the desk area.
- Desk Organizer: Paint and customize a desk organizer for pens and supplies.
- Nameplate: Craft a nameplate with your child’s name to give them a sense of ownership.
- Interactive Desk Mat: Place a world map or a educational desk mat for both protection and learning.
- Fabric Touches: Add a patterned fabric to a bulletin board or a chair for softness and style.
Remember, the goal is to create a space that feels like it’s truly theirs. Encourage your child to make their diy kids desk a showcase of their personality. They’ll be excited to use a desk that reflects who they are and what they love. This sense of personalization can increase their desire to spend time at the desk, be it for homework, drawing, or reading.

Maintaining and Upgrading the Desk Over Time
To keep your child’s diy kids desk in top condition, regular maintenance is important. As time goes on, you may also want to upgrade or adapt the desk to suit your child’s evolving needs. Here are simple tips to maintain and upgrade the kids desk over time:
- Regular Cleaning: Wipe down the desk weekly to prevent dust and stains. Use mild soap and water.
- Check for Wear: Inspect the desk for scratches or loose parts. Tighten screws or replace damaged areas promptly.
- Wood Treatment: If you used wood, treat it yearly to protect from damage. It helps to make the desk last longer.
- Desk Accessories: Add new organizers or holders as your child’s school supplies grow. These keep everything tidy.
- Adjust Heights: Change the chair or desk height as your child grows. This ensures their comfort and proper posture.
- Repaint: Give the desk a fresh coat of paint if the old one chips or to update the color for your child’s current taste.
- Upgrade Features: Install new, more advanced features like a monitor stand or a document holder when needed.
- Seasonal Decor: Let your child decorate the desk with seasonal items to keep their space fun and engaging.
With consistent care and occasional upgrades, the diy kids desk can be a long-lasting fixture in your child’s life. Staying on top of maintenance helps create a reliable and inspiring space for your child to learn and create.